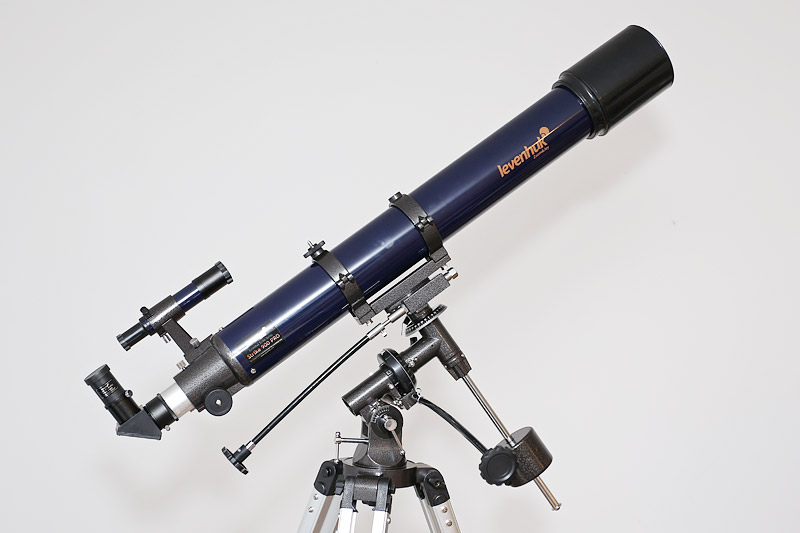
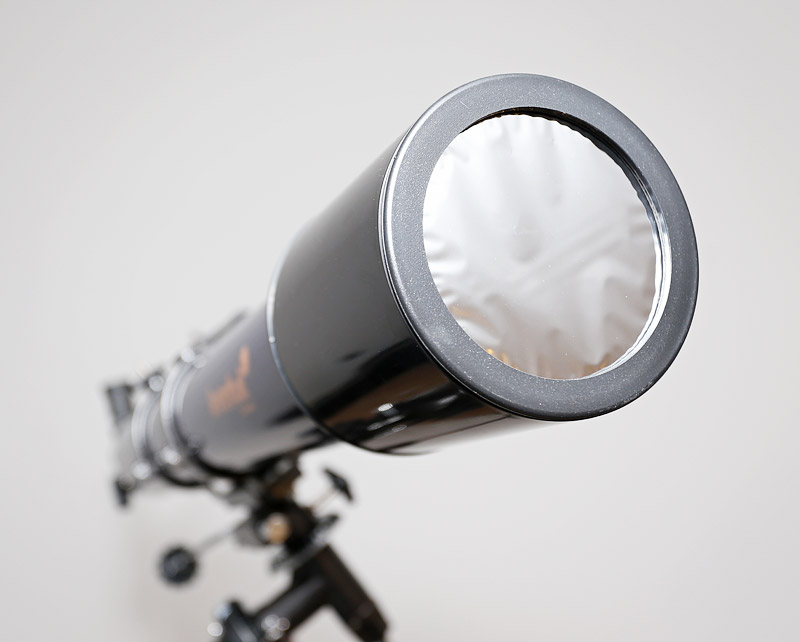
The Levenhuk Strike 900 Pro refractor and EQ2 mount.
The burgeoning astronomy enthusiast faces one of the most difficult decisions in the hobby – what to choose for a first telescope? The choice is difficult not only because of the vast range of available options but more so because of a lack of awareness of the viewer’s own preferences and tendencies. Ideally the first instrument will nourish a love of viewing the night sky that will enable the observer to get over any inconveniences or difficulties that might be encountered early in their journey.
I tried to keep these considerations in mind when assembling my impressions of the Levenhuk Strike 900 Pro – an equatorial mounted, long focus refractor kit clearly designed with beginners in mind. Before we start I do want to point out that this telescope was provided by Levenhuk on loan for the purposes of this review and I have spent the past four weeks putting it through its paces.
First Impressions
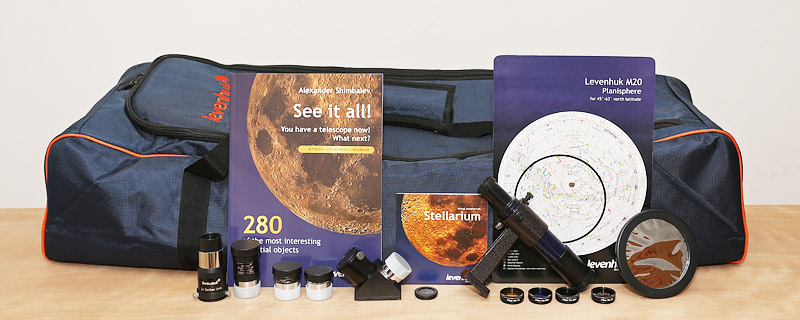
The Levenhuk Strike 900 Pro includes a comprehensive set of accessories.
At the heart of the Strike 900 Pro package is a 90mm f/10 achromatic refractor on a EQ2 class equatorial mount but the accessories are what set this kit apart. Levenhuk includes the usual finder, diagonal, and eyepieces, then adds a Barlow, filters for Lunar and planetary viewing, a high quality solar filter, a compass (included but not pictured above), object guide and planisphere, and a padded case to hold it all. All the components are shipped in a single, large box with many of the items individually packaged to avoid damage in transit.
The included 6×30 straight-through finder shows an inverted image typical of this class, still the finder is much better than plastic lensed units often included with lower end refractors. The images it gives are bright and sharp and the base uses a two-point adjustment system for quick alignment.
The 1.25″ 90° star diagonal appears identical to the one shipped with the Orion StarMax 90mm MCT and is capable of showing sharp details.
I was disappointed to find the provided 2x Barlow to be of low quality, constructed primarily from plastic. In practice it won’t often be used as the included 6.3mm Plossl is a quality eyepiece that will give 143x magnification – enough for detailed views of the Moon and planets. Still it’s nice to have the option of combining the 10mm and 2x to reach 180x on the Moon and double stars and investing in a quality 2x Barlow or Focal extender at some point would be worthwhile.
The included observer’s guide is organized by constellation and lists the showcase objects that can be found in each along with a chart showing their locations. While not intended to compete with a comprehensive catalog, the objects covered would keep any new observer busy for quite some time.
The Optical Tube Assembly
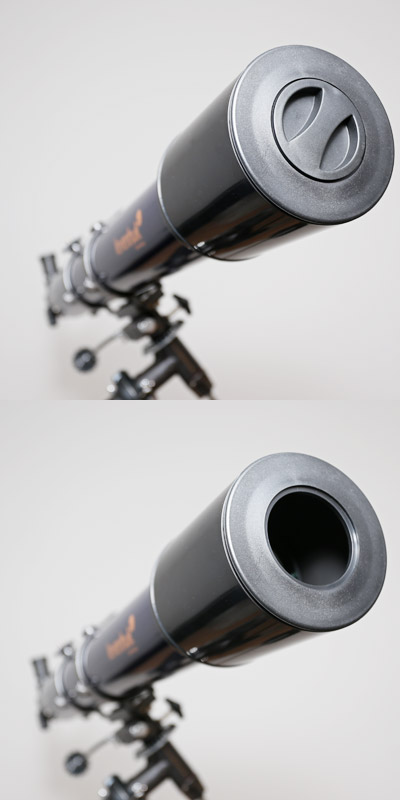
The objective cap can also be used as a 60mm mask.
Holding the OTA’s lens group up to the light displays the greenish color seen on multi-coated lenses. The tube’s interior is well baffled and the 1.25″ focuser has a smooth action, though be mindful not to touch the rack on the underside of the drawtube or you’ll be covered in the sticky grease typically found here.
The objective cover has a secondary cap that can be removed to act as a reduction mask, which turns the telescope into a 60mm f/15 instrument. This can be useful for viewing the Moon with reduced chromatic aberration but observing with a 60mm refractor can be a lot of fun in its own right – in addition to lunar, they’re great for many doubles and for challenging yourself on planets and DSOs.
The whole cover fits snugly into the dew shield – in fact without any protrusion to grip it can be difficult to remove and I found myself habitually removing the small cap to be able to grab onto the outer cover from the inside.
Observing with the Levenhuk Strike 900 Pro
One of the first subjects I viewed with the Levenhuk was Epsilon Lyrae. Both pairs of the Double Double were cleanly split at 90x with the included 10mm Super MA eyepiece. The stars were nicely round showing no signs of pinched optics or flaring.
Turning to the South I spotted bright Altair in the constellation Aquila and used the 6×30 finder to point the telescope at Lambda Aquilae. From here the open cluster M11 could be seen in the finder as a faint haze. Viewing through the 25mm Super MA eyepiece showed the Wild Duck cluster’s distinguished triangular shape @ 36x, and increasing power to 90x with the 10mm gave a beautiful view with many stars resolved.
On another night I was able to view M31 and was pleased with the telescope’s performance on this galaxy. Andromeda appeared nicely extended in 25mm eyepiece and M32 and M110 were visible as well.
A 90mm refractor and Mak on the Moon
A 90mm telescope is well suited to observing the Moon and will show an incredible amount of detail. Since I own a 90mm Mak I though it might be interesting to compare the Lunar views through the two telescopes. I’d done this previously with a much more expensive 80mm triplet refractor and was curious to see how the Levenhuk would fare.
Starting at low power with the 25mm, I was impressed by the clarity of the view – details were sharp and well defined with some slight false color noticeable on the limb of the Moon when looking for it. I briefly switched to a 25mm Plossl to verify the eyepiece was not the cause of the false color, then went back to using the provided 25mm Super MA.
After enjoying the Moon at this power for a while I moved to the 10mm. Smaller details were now visible and remained sharp but a bit of violet CA also became more apparent. Again I switched to a 10mm Plossl to eliminate color added by the eyepiece and saw the CA improve some but remain visible.
The 6.3mm Plossl showed more of the same at 143x – sharpness continued to impress.
Compared to the 90mm Mak, the refractor gave a brighter, more contrasty image at every magnification with a bit of added CA. Despite the slight color, details are crisp and pleasing.
The EQ Mount
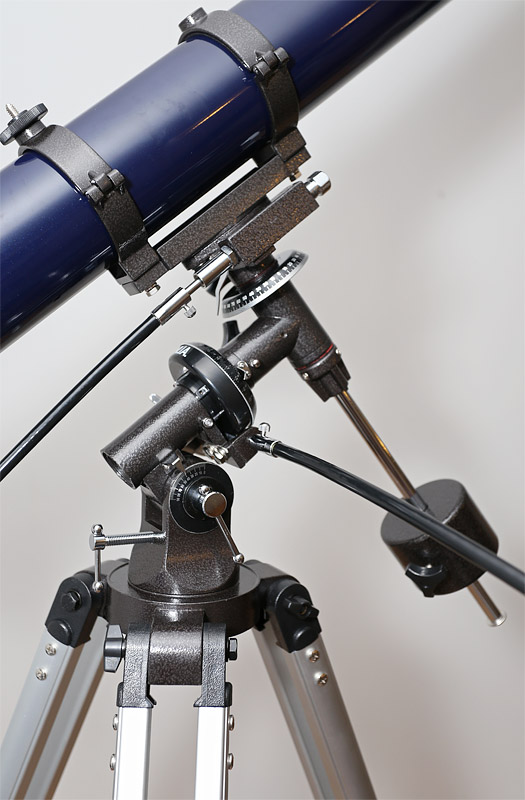
The combination of the EQ2 mount with a refractor of this size is adequate but not outstanding. It is a bit vibration prone, requiring about 4 seconds to settle after focusing or moving the telescope, though with a light touch this is less of an issue. While it is functional and serves as a good introduction to the basics of using a German Equatorial Mount it is not robust enough for great precision, which in my opinion is one of the biggest benefits of equatorial mounting.
During last month’s lunar eclipse I setup the Strike 900 and 25mm for low power viewing while spending most of the time behind my 5″ refractor with DSLR attached. With only the roughest of polar alignments – I basically plopped the mount down with the Right Ascension axis facing somewhat North and the elevation around 40º – it was nice to be able to leave the scope for 10-15 minutes at a time and then easily reacquire the Moon just by turning the RA slow motion knob a few turns.
Staring at the Sun
Levenhuk includes a quality solar filter for observing the Sun.
Levenhuk includes a solar filter that uses high quality Baader AstroSolar film and covers the front of the telescope enabling white light solar observation.
Viewing the Sun through a telescope is inherently dangerous; a misstep can result in permanent eye damage and blindness. Some observers refuse to use an objective mounted filter for solar observing but if you are aware of the risks and take appropriate precautions it can be done safely. Always ensure the objective mounted filter is tightly secured to the telescope. When viewing the Sun the telescope’s finder should be capped and preferably removed altogether.
Unlike most objective filters, which must be designed for a range of dew shield diameters and secure to the outside of the dew shield using tension provided by plastic screws, the included filter fits snugly inside the dew shield. This greatly reduces the chance of the filter becoming loosened or accidentally removed as it takes a concentrated effort to remove it from the telescope.
Using the solar filter it is possible to view many features on the Sun’s surface, though it does take some time to become accustomed to viewing these details. The 25mm eyepiece at 36x gives a full disk view of the Sun, which at first will appear to be a blank white disc. After several minutes I began to notice dark sunspots, granulation of the surface, and even faculae, which appear as pure white channels in the slightly grainy surface.
With so much to see and rapid changes the Sun is a fantastic subject for frequent observation, and I am very pleased that Levenhuk includes a quality solar filter as part of the Strike 900 Pro package.
Parting Thoughts
A 90mm f/10 refractor makes for a good general use telescope. It’s size and weight are manageable while the focal ratio is long enough to reduce visible chromatic aberration to low levels. It will be fantastic on the Moon, allow detailed observation of Jupiter, Saturn, and Mars around their respective oppositions, and be very good on many star clusters – targets that were of primary interest to me when I purchased my first telescope.
The 1.25″ focuser’s 1.8º maximum field of view does limit the views of the largest objects such as the Pleiades, though objects in this class tend to look great through a 8 or 9x finder and the addition of such a finder would be welcome to the Levenhuk.
If you are looking for a 90mm refractor for viewing the Moon, planets, and brighter deep sky objects the Levenhuk Strike 900 Pro is a great value. Other manufacturers offer similar telescopes on similar EQ2 mounts, such as the Orion AstroView 90mm, but I’ve yet to see one with such a complete and useful package of accessories.
The comprehensive package provided by Levenhuk, though not perfect in every regard, would allow a new observer to focus on learning the night sky rather than dwelling on acquiring supplemental accessories.
-Dave
Original content copyright 2015 by David Philips. All Rights Reserved. This post may contain links to affiliate sites; sales through affiliate links may benefit this site.